Java Swing first programs
Java offers two standard libraries for graphical user interface (GUI). The first one is the simpler java.awt package, which contains classes to create windows (java.awt.Window), buttons (java.awt.Button), textfields (java.awt.TextField), and so on. These classes are simple wrappers to the platform's GUI objects. For instance, a window created with awt in Java would look like a Windows window in Windows, and like a Gnome window under GNU/Linux Gnome interface. The advantage is that the "look-and-feel" is exactly like the native system. The disadvantage is that since there is a big variety of platforms, this package does not allow one to finely tune the graphical components, since not every feature is allowed in all platforms.
We will rather look at the second library which can be found in the javax.swing package. This contains classes with similar names to the awt package, but they are prefixed by the letter J. For instance, a Java swing window is the javax.swing.JWindow class, a button is the javax.swing.JButton class. The difference with the awt is that swing objects are drawn by Java, so they look and act exactly the same in all systems. This offers better control over the components.
In this chapter, we will program our first programs in Swing toolkit. The examples are going to be very simple. We will cover some basic functionality.
Our first example
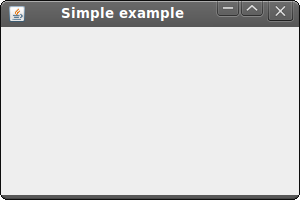
In our first example, we will show a basic window on the screen.
import javax.swing.JFrame;
import javax.swing.SwingUtilities;

public class Example extends JFrame {

    public Example() {
       setTitle("Simple example");
       setSize(300, 200);
       setLocationRelativeTo(null);
       setDefaultCloseOperation(EXIT_ON_CLOSE);
    }

    public static void main(String[] args) {
       Example ex = new Example();
       ex.setVisible(true);
    }
}
While this code is very small, the application window can do quite a lot. It can be resized, maximized, minimized. All the complexity that comes with it has been hidden from the application programmer.
import javax.swing.JFrame;
import javax.swing.SwingUtilities;
Here we import Swing classes, that will be used in the code example.
public class Example extends JFrame {
The Example class inherits from the JFrame widget. JFrame
is a toplevel container, which is used for placing other widgets.
setTitle("Simple example");
Here we set the title of the window using the setTitle()
method.
setSize(300, 200);
This code will resize the window to be 300px wide and 200px tall.
setLocationRelativeTo(null);
This line will center the window on the screen.
setDefaultCloseOperation(EXIT_ON_CLOSE);
This method will close the window, if we click on the close button of the titlebar. By default nothing happens.
        Example ex = new Example();
        ex.setVisible(true);
We create an instance of our code example and make it visible on the screen. Note that the main method is static, so when it is called (when the program starts), there is not yet any object Example. Again, main is like an external global method. Only when we explicitly create an instance (with new Example()) that an object Example, thus a JFrame appears.
Quit button
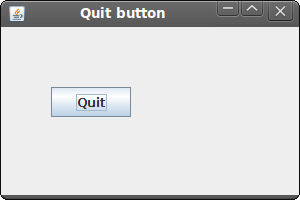
In our next example, we will have a button. When we click on the button, the application terminates.
import java.awt.event.ActionEvent;
import java.awt.event.ActionListener;

import javax.swing.JButton;
import javax.swing.JFrame;
import javax.swing.JPanel;
import javax.swing.SwingUtilities;


public class Example extends JFrame {

    public Example() {
        initUI();
    }

    public final void initUI() {

       JPanel panel = new JPanel();
       getContentPane().add(panel);

       panel.setLayout(null);

       JButton quitButton = new JButton("Quit");
       quitButton.setBounds(50, 60, 80, 30);
       quitButton.addActionListener(new ActionListener() {
           public void actionPerformed(ActionEvent event) {
               System.exit(0);
          }
       });

       panel.add(quitButton);

       setTitle("Quit button");
       setSize(300, 200);
       setLocationRelativeTo(null);
       setDefaultCloseOperation(EXIT_ON_CLOSE);
    }

    public static void main(String[] args) {
       public void run() {
           Example ex = new Example();
           ex.setVisible(true);
       }
    }
}
We position a JButton on the window. We will add an action listener
to this button.
public Example() {
    initUI();
}
It is a good programming practice to put the code that creates the GUI inside a specific method.
JPanel panel = new JPanel();
getContentPane().add(panel);
We create a JPanel component. It is a generic lightweight
container. We add the JPanel to the JFrame.
panel.setLayout(null);
By default, the JPanel has a FlowLayout manager. The layout
manager is used to place widgets onto the
containers. If we call setLayout(null) we can position our
components absolutely. For this, we use the
setBounds() method.
JButton quitButton = new JButton("Quit");
quitButton.setBounds(50, 60, 80, 30);
quitButton.addActionListener(new ActionListener() {
    public void actionPerformed(ActionEvent event) {
        System.exit(0);
  }
});
Here we create a button. We position it by calling the setBounds()
method. Then we add an action listener.
The action listener will be called, when we perform an action on the button.
In our case, if we click on the button.
The click will terminate the application.
panel.add(quitButton);
In order to show the quit button, we must add it to the panel.
A tooltip
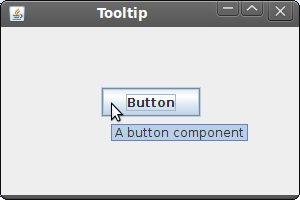
Tooltips are part of the internal application's help system. The Swing shows a small rectangular window, if we hover a mouse pointer over an object.
import javax.swing.JButton;
import javax.swing.JFrame;
import javax.swing.JPanel;
import javax.swing.SwingUtilities;


public class Example extends JFrame {

    public Example() {
        initUI();
    }

    public final void initUI() {

        JPanel panel = new JPanel();
        getContentPane().add(panel);

        panel.setLayout(null);
        panel.setToolTipText("A Panel container");

        JButton button = new JButton("Button");
        button.setBounds(100, 60, 100, 30);
        button.setToolTipText("A button component");

        panel.add(button);

        setTitle("Tooltip");
        setSize(300, 200);
        setLocationRelativeTo(null);
        setDefaultCloseOperation(EXIT_ON_CLOSE);
    }

    public static void main(String[] args) {
       public void run() {
           Example ex = new Example();
           ex.setVisible(true);
       }
    }
}
In the example, we set the tooltip for the frame and the button.
panel.setToolTipText("A Panel container");
To enable a tooltip, we call the setTooltipText() method.
Now you do
Search the Java Swing API to do the following.
Add a label to your application (use JLabel).
Add a text field to your application.
For bigger applications, it is more convenient to define an action listener that is not anonymous. The JFrame class can itself act like one by implementing the ActionListener interface.
import javax.swing.*;
import java.awt.*;
import java.awt.event.*;


public class Example extends JFrame implements ActionListener{

    public Example() {
        initUI();
    }

    public final void initUI() {
        JButton button1 = new JButton("Button1");
        JButton button2 = new JButton("Button2");
        button1.setBounds(50, 60, 100, 30);
        button2.setBounds(180, 60, 100, 30);
				getContentPane().setLayout(null);
        getContentPane().add(button1);
        getContentPane().add(button2);

				button1.addActionListener(this);
				button2.addActionListener(this);
        setSize(300, 200);
        setLocationRelativeTo(null);
        setDefaultCloseOperation(EXIT_ON_CLOSE);
    }
		public void actionPerformed(ActionEvent e){
				System.out.println("Oui!");
		}
    public static void main(String[] args) {
        Example ex = new Example();
        ex.setVisible(true);
    }
}
It is of course possible to define externally the action listener class as follows.
class MyActionListener implements ActionListener{
	public MyActionListener(String msg){
		this.msg = msg;
	}
	public void actionPerformed(ActionEvent e){
		System.out.println(msg);
	}
	String msg;
}
In the above example, we used the same action listener for two buttons. In general, an application may contain tens of buttons, and we do not want to create a new class for each of them. In order to distinguish the "source" of the action, modify your actionPerformed method by using the information contained in the ActionEvent argument (check out the API).
Add a file chooser button which displays the chosen file name in the text
field.
Modify your file chooser to only select directories.
There are plenty of other components, such as progress bars, lists, tables... One can change the look-and-feel (the appearance), detect drag-and-drop, use the system tray, show a splash screen, so on. For further details on Java Swing components see here, which is also the source of this tutorial. The Java Tutorials are also a good way to go further.